
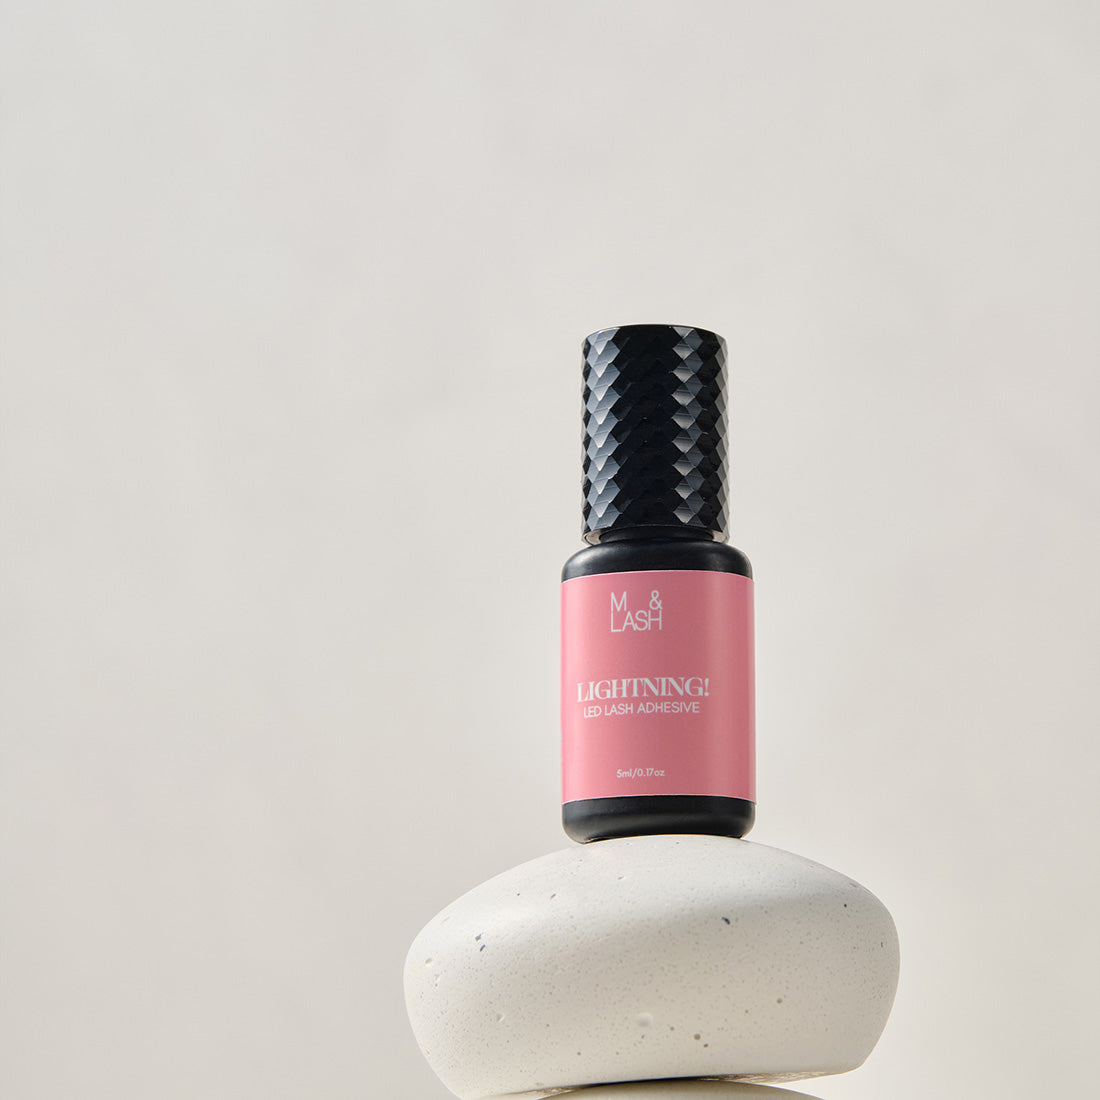


Description
xSetting a New Standard in Lash Adhesives by Canada’s First LED Lash Specialist
As a trailblazer of K-Beauty and the first to introduce the LED lash system in Canada, I’ve developed this LED Lash Glue based on years of hands-on experience and countless positive client reviews
This product combines advanced ingredients with cutting-edge technology to deliver exceptional hold, speed, and safety
After years of testing and feedback, this glue is designed to redefine lash extensions for professionals who expect the best
Key Features
-
Ultra-Fast Curing (0.5–1s)
Cures in just 0.5 to 1 second with UV/LED systems, allowing for quicker treatments and greater efficiency during lash applications. -
Crystal Clear Formula
The transparent finish blends perfectly with natural lashes for a seamless and invisible bond. -
Strong Retention (Up to 8 Weeks)
Designed to withstand sweat, movement, and face-sleeping habits, this glue delivers long-lasting results even in challenging conditions. -
Gentle, Low-Irritation Formula
Free from formaldehyde and latex with minimal odor—suitable for even the most sensitive clients. -
All-Season Stability
Performs consistently in varying temperature and humidity levels, offering reliability all year round. -
Precision Thin Viscosity
Crafted for accuracy, the glue’s smooth texture ensures clean, clump-free application every time. -
Perfectly UV-Compatible (395–420nm)
Optimized for use with 5W UV LED lash lamps for rapid and secure curing.
Designed for Professionals
-
No Bonder Needed
Powerful adhesion means a bonder is optional, reducing extra steps while maintaining strong retention. -
Water & Oil Resistant
Holds up beautifully even after immediate contact with water or oil, ensuring lasting results. -
Safety Guidelines
Patch tests are recommended for sensitive clients. Always use under-eye UV shields to protect the skin and eyes during application.
For Professional Use Only
This product is intended for trained and certified lash professionals only. Proper usage and safety training are essential for best results
* LED glue usage
1. Prepare the LED UV Lamp
• LED glue does not cure naturally like standard lash glue. It requires a LED UV lamp to harden.
2. Prep the Natural Lashes
• Cleanse the client’s natural lashes, then remove any oil or dust using a lash primer.
3. Set Up the Glue
• Dispense one drop of LED glue onto a glue palette or glue ring.
4. Application
• Dip the lash extension into the glue and place it onto the natural lash.
• Immediately cure the bonded area under the LED UV lamp (about 1–2 seconds).
• Repeat for each lash.
5. Finishing Touch
• After completing the set, cure the entire lash line one more time for extra strength.
6. Important Notes
• The glue will only cure when exposed directly to the LED UV lamp light.
• It will not harden under natural sunlight or regular indoor lighting.
Also, you don’t need to form a glue ring. Our glue is easy to spread by gently rubbing it on. If the glue forms a ring, it can look messy, almost like dried eye discharge, so it should be avoided. Instead, spread the glue evenly on the natural lash (near the root) before curing.
- Choosing a selection results in a full page refresh.